How To: Make Floating Shelves Using Formica® Laminate
Follow our step-by-step instructions below to create a cost-effective, DIY floating laminate wall shelf.
If you’re looking for a modern, cost-effective way to upgrade your home and maximize space, floating laminate wall shelves may be the right solution for you! Available in a wide range of woodgrains, patterns and colors, Formica® Laminate offers the design flexibility needed to make these shelves feel right for your space. Formica® Laminate is simple to install, durable, and easy to maintain – all perfect qualities for your new floating shelves!
For a clean, professional look, it’s important to use the right tools and techniques when cutting and applying laminate. You’ll find a complete supply list below, including materials and tools. If you’d like more information about cutting laminate in a way that avoids chips, cracks or breaks, please refer to our article DIY Tips & Tricks: How to Cut Formica® Laminate.
Getting Started: Decisions to be Made
Before buying materials, there are a few decisions that must be made. First, where are you planning on hanging your shelves? Second, how many shelves do you need? Third, how will each shelf be used?
Location – Choosing which room the shelves will be in may seem like the easy part, but it requires confirmation from a stud finder. Once you’ve selected the room and wall, confirm that the location has studs for the shelves to be attached to. This is an important step if you intend to put anything with weight on your shelves.
Quantity – If you plan on creating more than one shelf, it’s important to think about possible sizes as well as placement in relation to other existing features (windows, doors, etc.). For longer shelves (over 4’ in length), you may only want two or three. If you’re opting for shorter shelves (under 4’ in length) or a combination of shelving lengths, you may want four or five. Ultimately, the amount of available wall space as well as surrounding features will impact the final decision.
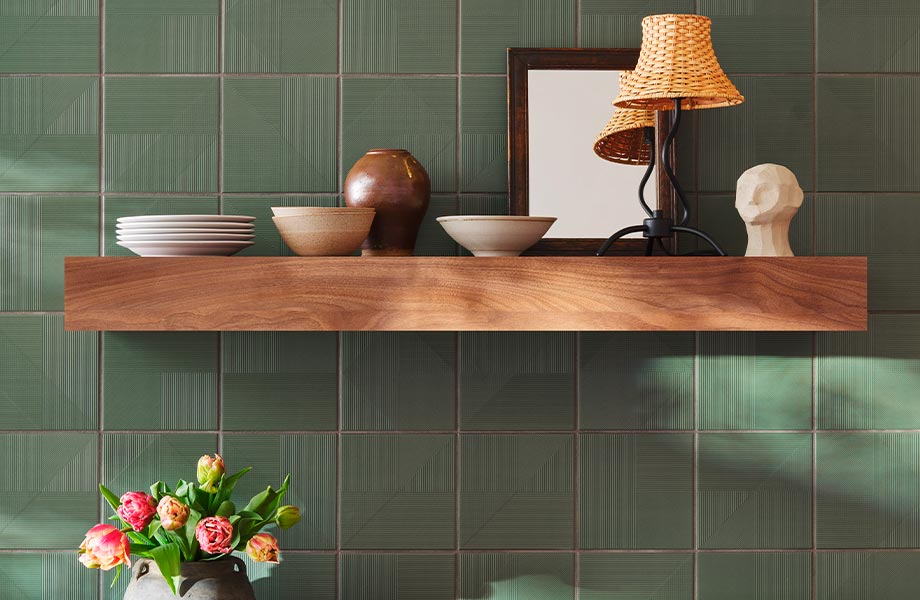
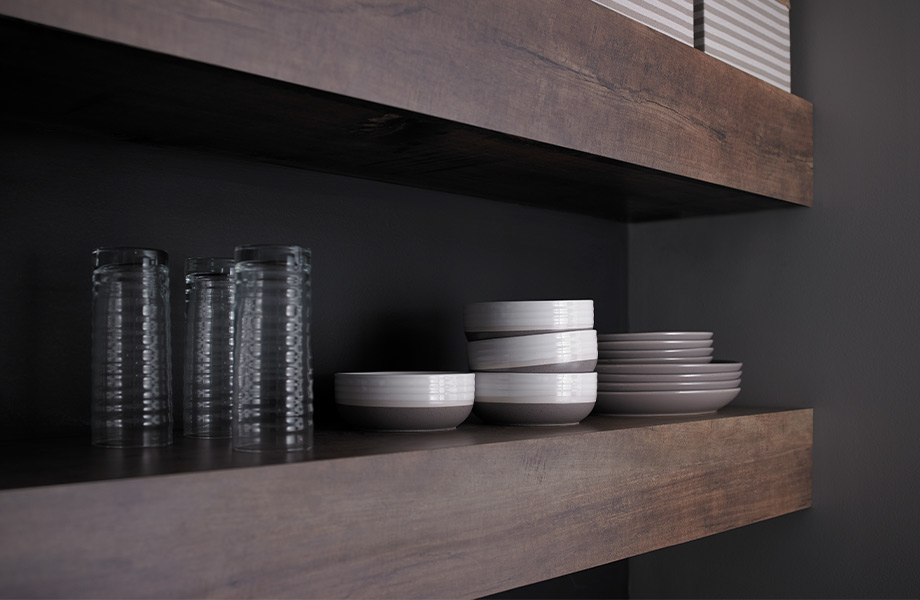
Intended Use – Floating shelves are used for both decorative and storage purposes. Depending on what the shelves are intended for will impact stability needs, depths, and spacing away from other shelves/features.
For decorative floating shelves (pictures, books, etc.), typically a depth between 8” to 12” is sufficient. For storage floating shelves (plates, bowls, etc.), typically a depth between 10” to 12” is needed.
Regarding spacing from other shelves/features, typically a distance of 12” to 15” is appropriate for decorative shelves; 15” to 18” for storage shelves.

Getting Started: Project Supplies
Please note that the quantity of certain materials needed will vary depending on the number and size of shelves made.
- Contact cement
- ¾" MDF board
- Formica® Laminate
- Safety glasses
- Measuring tape
- J-Roller
- Drop cloth
- Sawhorses
- Paint brush (paint roller and tray for longer shelves)
- Circular saw with fine carbide-tipped blade
- Detail sander
- Router with flush trim bit
- Fine tooth mill file
- Household cleaner and cleaning cloth
Acetone and paper towels - Markers
- Stud finder
- Level
- Screws and Screwdriver
- Wall-mounting brackets
- Dust mask
- Thin Dowel Rods (approx. 1 per foot)
Getting Started: Safety First
Before cutting, sanding or gluing, make sure you’re in a well-ventilated room and have read the adhesive precautions and directions. Also, be sure to wear safety glasses when using power tools, a dust mask when sanding, and cover your floor with a drop cloth.
Step One: Measure and Cut the MDF
Start with a piece of medium-density fiberboard (MDF) or particle board. Measure and cut the board to the desired shelf size. (Note: You should be able to get multiple shelves out of one piece of MDF or particle board. Be sure to clearly measure and mark the board before cutting to optimize the number of shelves.)
Wipe off any debris with a damp cloth and let the shelves dry.
Step Two: Measure and Cut the Formica® Laminate
It’s important to get the exact measurements for your shelves. You will want to cut your Formica® Laminate to be 3/8” to 1/2" larger than your substrate on all four sides to ensure full coverage. Note: A second piece of laminate will be needed, cut to the same size for each shelf to cover the bottom. The laminate will be trimmed down later.
Once you’ve measured the laminate sheet, cut it using a circular saw with a fine, carbide-tipped blade. Reminder: The Formica® Laminate sheet should be decor side down when you cut. After you’ve cut the laminate, wipe the surface with a damp cloth to remove any dirt or debris.
Step Three: Measure, Cut and Affix the Edge Strips
The next step is to measure and cut edge strips of Formica® Laminate to use on the shelf sides. Just like the shelf tops and bottoms, cut the laminate 3/8” to 1/2" larger than your substrate, so you have enough coverage.
Once the edge strips have been cut, brush contact cement on the BACK of the Formica® Laminate strips, then brush two coats of adhesive to the shelf edge. Let the adhesive get tacky before applying the edge strips by hand. Then, use a J-roller to apply even pressure to bond the edge strips to the shelf edge, working from the center out.
Step Four: Trim, Sand and Affix the Formica® Laminate
After each edge surface is covered, trim the excess material on the sides and ends with a router and flush trim bit. Use a detailed sander to make sure the laminate is not higher or wider than the substrate. Wipe the surface with a damp cloth to remove any dirt or debris.
Now it’s time to affix the Formica® Laminate onto the top and bottom of your shelves. For shelves longer than 2’ in length, use a paint roller for adhesive application and follow the Long Shelf Application below. For shelves shorter than 2’ in length, use a paint brush for adhesive application and follow the Short Shelf Application below.
Long Shelf Application
Use a paint roller to apply contact cement to the back of the Formica® Laminate sheet as well as the surface of the shelf. While the adhesive gets tacky to the touch, place the dowel rods 6” apart on the shelf’s surface, ensuring they are long enough to hang over the edge for easy removal.
With the laminate on top of the dowel rods, align the surfaces so the overhang is parallel to the shelf. Then, slide the dowel rods out, starting with the center and working out. Immediately apply pressure to the shelf top with a J-roller. Repeat the same process to apply laminate to the bottom of the shelf.
Short Shelf Application
Use a paint brush to apply contact cement to the back of the Formica® Laminate sheet as well as the surface of the shelf. Let the adhesive get tacky before applying the top sheet by hand. Then, use a J-roller to apply even pressure to bond the edge strips to the shelf edge, working from the center out. Repeat the same process to apply laminate to the bottom of the shelf.
Step Five: Final Trim
Use a flush trim router to trim the edges. Then file the edges in a downward direction to get them flush and remove any sharp edges. Clean the top, sides, and bottom thoroughly with acetone to remove any extra adhesive, then use an everyday household cleaner to wipe the top again.
Let all shelves dry at least 24 to 48 hours before attaching them to the wall.
Step Six: Time to Hang Your Custom Shelves
Using the mounting instructions provided by the wall bracket manufacturer, affix the brackets to the wall at pre-measured points. Secure the brackets with screws, using wall anchors if you’re not drilling into studs.
Attach your laminated shelf onto the secured wall brackets*. Check that it’s level, making any small, necessary adjustments as needed. Repeat steps for all additional shelves.
*Depending on the style of wall bracket selected, you may have additional steps.
Voila – your custom floating shelves are ready for decorations!
Category
Related Articles


