How-To: DIY Laminate Side Tables
Follow this step-by-step guide to crafting stylish, durable side tables with Formica® Laminate.
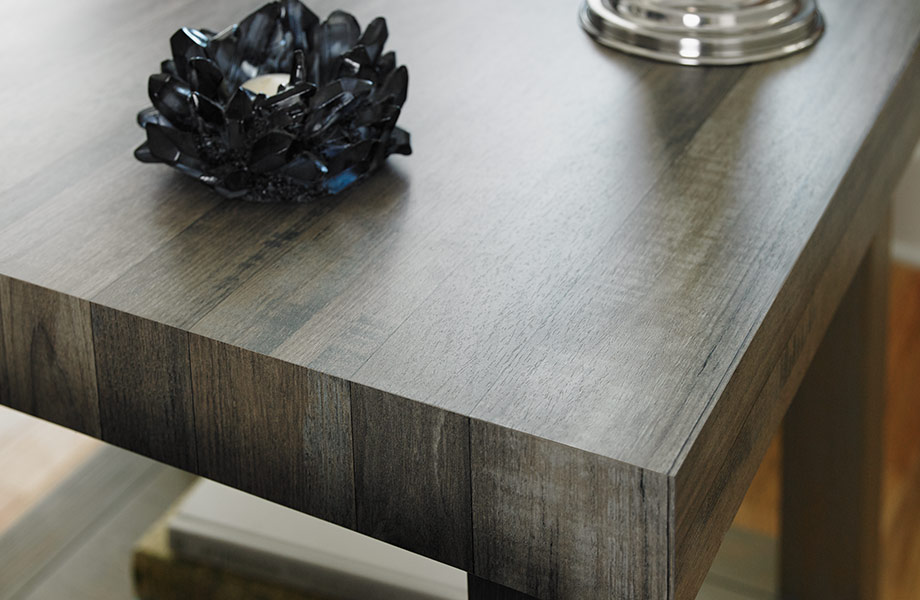
Create a stylish, durable side table for your home using Formica® Laminate. With endless colors and patterns – including those that mimic wood, stone or just show off bold patterns – it’s easy to match your style while enjoying a surface that’s scratch-resistant and easy to clean.
Materials List:
- Plywood or MDF boards (for tabletop and base)
- Formica® Laminate sheets (choose your favorite color/pattern)
- Contact cement or laminate adhesive
- J-roller or laminate roller
- Sandpaper (medium and fine grit)
- Table legs or base (wood, metal, or prefabricated)
- Saw, clamps, and measuring tape
- Laminate strips for self edging if using this option
- Goggles, gloves, ear/hearing protection (always build with safety in mind)
Step 1: Plan and Cut Your Table
Measure the desired height and tabletop size for your side table. Use a saw to cut your plywood or MDF to size. Sand edges smooth to remove splinters and ensure the laminate adheres evenly.
Step 2: Prepare the Laminate
Cut Formica® Brand Laminate slightly larger than your tabletop dimensions. This allows for trimming and ensures full coverage.
If you plan to self-edge, also cut narrow laminate strips slightly wider than the thickness of your tabletop. When self-edging, the edge strips should be applied first before the tabletop.
Step 3: Apply Adhesive
Apply contact cement or laminate adhesive to both the tabletop and the backside of the laminate, following the adhesive product instructions. Let it set until tacky.
If self-edging, apply adhesive to both the table edges and the back of the laminate edge strips as well.
Another alternative, if using a high-quality birch plywood as a substate, is to sand the edges smooth and varnish for a modern look – or leave unfinished for a raw look.
Optional Step: Apply Self-Edge
If you are using a self-edge, the edging must be adhered to the substrate before the tabletop.
Apply the self-edging by pressing the laminate edge strips firmly onto the tabletop edges and roll them tight to the substrate using a J-roller.
Once secure, trim the edge strips flush with the tabletop surface.
Step 4: Adhere Tabletop Laminate
For the tabletop, carefully place the laminate on the tabletop, starting from one edge and smoothing it down gradually. Use a J-roller to remove air bubbles and ensure full adhesion.
Step 5: Trim Excess Laminate
Once the laminate is fully adhered and secure, trim edges with a router, laminate trimmer, or fine sandpaper.
Step 6: Attach the Base
Secure your chosen table legs or base to the tabletop. Check for stability and adjust as needed.
Step 7: Finish and Enjoy
Wipe the table surface clean and admire your handiwork. Your new Formica® Brand Laminate side table is ready for everyday use!


